

RN汇总
安卓打包签名
keytool -genkeypair -v -storetype PKCS12 -keystore my-release-key.keystore -alias my-key-alias -keyalg RSA -keysize 2048 -validity 10000这条命令会要求你输入密钥库(keystore)和对应密钥的密码,然后设置一些发行相关的信息。最后它会生成一个叫做
my-release-key.keystore的密钥库文件把
my-release-key.keystore文件放到你工程中的android/app文件夹下。
编辑~/.gradle/gradle.properties(全局配置,对所有项目有效)或是项目目录/android/gradle.properties(项目配置,只对所在项目有效)。如果没有gradle.properties文件你就自己创建一个,添加如下的代码(注意把其中的****替换为相应密码)
注意:~符号表示用户目录,比如 windows 上可能是C:\Users\用户名,而 mac 上可能是/Users/用户名。
MYAPP_RELEASE_STORE_FILE=my-release-key.keystore
MYAPP_RELEASE_KEY_ALIAS=my-key-alias
MYAPP_RELEASE_STORE_PASSWORD=*****
MYAPP_RELEASE_KEY_PASSWORD=*****
把签名配置加入到项目的 gradle 配置中
编辑你项目目录下的android/app/build.gradle,添加如下的签名配置:
...
android {
    ...
    defaultConfig { ... }
    signingConfigs {
        release {
            if (project.hasProperty('MYAPP_RELEASE_STORE_FILE')) {
                storeFile file(MYAPP_RELEASE_STORE_FILE)
                storePassword MYAPP_RELEASE_STORE_PASSWORD
                keyAlias MYAPP_RELEASE_KEY_ALIAS
                keyPassword MYAPP_RELEASE_KEY_PASSWORD
            }
        }
    }
    buildTypes {
        release {
            ...
            signingConfig signingConfigs.release
        }
    }
}
...
生成发行 APK 包
只需在终端中运行以下命令:
$ cd android
$ ./gradlew assembleRelease
译注:
cd android表示进入 android 目录(如果你已经在 android 目录中了那就不用输入了)。./gradlew assembleRelease在 macOS、Linux 或是 windows 的 PowerShell 环境中表示执行当前目录下的名为 gradlew 的脚本文件,且其运行参数为 assembleRelease,注意这个./不可省略;而在 windows 的传统 CMD 命令行下则需要去掉./。
生成的 APK 文件位于android/app/build/outputs/apk/release/app-release.apk,它已经可以用来发布了。
国内镜像配置
buildscript {
    ext {
        buildToolsVersion = "36.0.0"
        minSdkVersion = 24
        compileSdkVersion = 36
        targetSdkVersion = 36
        ndkVersion = "27.1.12297006"
        kotlinVersion = "2.1.20"
    }
    repositories {
        maven { url 'https://maven.aliyun.com/repository/public' }
        google()
        mavenCentral()
    }
    dependencies {
        classpath("com.android.tools.build:gradle")
        classpath("com.facebook.react:react-native-gradle-plugin")
        classpath("org.jetbrains.kotlin:kotlin-gradle-plugin")
    }
}
隐私政策配置
import React from 'react';
import {
  Modal,
  View,
  Text,
  StyleSheet,
  ScrollView,
  TouchableOpacity,
  BackHandler,
} from 'react-native';

interface PrivacyPolicyModalProps {
  visible: boolean;
  onAgree: () => void;
  onDisagree: () => void;
}

const PrivacyPolicyModal = ({
  visible,
  onAgree,
  onDisagree,
}: PrivacyPolicyModalProps) => {
  return (
    <Modal
      visible={visible}
      transparent={true}
      animationType="fade"
      statusBarTranslucent
      onRequestClose={onDisagree}>
      <View style={styles.modalContainer}>
        <View style={styles.modalContent}>
          <Text style={styles.title}>隐私政策</Text>
          <ScrollView style={styles.scrollContent}>
            <Text style={styles.paragraph}>
              欢迎使用我们的应用!我们非常重视您的个人隐私和数据安全。请仔细阅读以下隐私政策内容:
            </Text>
            <Text style={styles.subtitle}>1. 信息收集</Text>
            <Text style={styles.text}>
              我们可能收集的信息包括但不限于:{'\n'}• 设备信息{'\n'}• 使用记录
              {'\n'}• 位置信息{'\n'}• 个人资料
            </Text>
            <Text style={styles.subtitle}>2. 信息使用</Text>
            <Text style={styles.text}>
              我们收集的信息将用于:{'\n'}• 提供和改进服务{'\n'}• 个性化用户体验
              {'\n'}• 发送通知和更新
            </Text>
          </ScrollView>
          <View style={styles.buttonContainer}>
            <TouchableOpacity
              style={[styles.button, styles.disagreeButton]}
              onPress={onDisagree}>
              <Text style={styles.disagreeButtonText}>不同意</Text>
            </TouchableOpacity>
            <TouchableOpacity
              style={[styles.button, styles.agreeButton]}
              onPress={onAgree}>
              <Text style={styles.agreeButtonText}>同意并继续</Text>
            </TouchableOpacity>
          </View>
        </View>
      </View>
    </Modal>
  );
};

const styles = StyleSheet.create({
  modalContainer: {
    flex: 1,
    backgroundColor: 'rgba(0, 0, 0, 0.5)',
    justifyContent: 'center',
    alignItems: 'center',
    padding: 20,
  },
  modalContent: {
    backgroundColor: 'white',
    borderRadius: 16,
    width: '100%',
    maxHeight: '80%',
    padding: 20,
  },
  title: {
    fontSize: 20,
    fontWeight: 'bold',
    textAlign: 'center',
    marginBottom: 15,
    color: '#333',
  },
  scrollContent: {
    maxHeight: 400,
  },
  paragraph: {
    fontSize: 14,
    color: '#666',
    marginBottom: 15,
    lineHeight: 20,
  },
  subtitle: {
    fontSize: 16,
    fontWeight: '600',
    color: '#333',
    marginTop: 10,
    marginBottom: 8,
  },
  text: {
    fontSize: 14,
    color: '#666',
    marginBottom: 15,
    lineHeight: 20,
  },
  buttonContainer: {
    flexDirection: 'row',
    justifyContent: 'space-between',
    marginTop: 20,
    gap: 12,
  },
  button: {
    flex: 1,
    padding: 12,
    borderRadius: 8,
    alignItems: 'center',
  },
  agreeButton: {
    backgroundColor: '#007AFF',
  },
  disagreeButton: {
    backgroundColor: '#fff',
    borderWidth: 1,
    borderColor: '#ddd',
  },
  agreeButtonText: {
    color: '#fff',
    fontSize: 16,
    fontWeight: '500',
  },
  disagreeButtonText: {
    color: '#666',
    fontSize: 16,
    fontWeight: '500',
  },
});

export default PrivacyPolicyModal;
/**
 * Sample React Native App
 * https://github.com/facebook/react-native
 *
 * @format
 */

import React, { useState } from 'react';
import { NavigationContainer } from '@react-navigation/native';
import RootStack from './src/routes';
import PrivacyPolicyModal from './src/components/PrivacyPolicyModal';
import PrivacyDisagreeScreen from './src/pages/PrivacyDisagreeScreen';

type PrivacyStatus = 'pending' | 'agreed' | 'disagreed';

function App() {
  const [privacyStatus, setPrivacyStatus] = useState<PrivacyStatus>('pending');
  async function handleAgree() {
    setPrivacyStatus('agreed');
  }
  function handleDisagree() {

    setPrivacyStatus('disagreed');
  }
  if (privacyStatus === 'pending') {
    return (
      <PrivacyPolicyModal
        visible={true}
        onAgree={handleAgree}
        onDisagree={handleDisagree}
      />
    );
  }

  if (privacyStatus === 'disagreed') {
    return (
      <PrivacyDisagreeScreen
        onRetry={() => setPrivacyStatus('pending')}
      />
    );
  }

  return (
    <NavigationContainer>
      <RootStack />
    </NavigationContainer>
  );
}

export default App;
android模拟器问题
模拟器已连接wifi显示无法访问互联网
打开模拟器wifi详情,记住下ip和网关!!!
电脑cmd输入 ipconfig/all 获取到dns信息
右上角修改高级设置。选择静态ip,输入记录的ip和网关,再输入获取到的两个dns信息。
保存后,显示已连接/网络连接受限。正常就好了
如果这个处理好了,可能下面的红屏问题就没有了
模拟器显示红屏
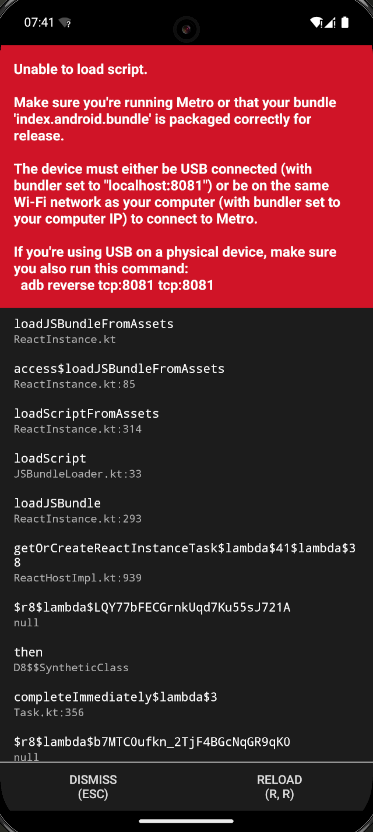
这个是模拟器没有连接到正确的bundle地址,应该是这个http://localhost:8081/index.bundle?platform=android
模拟器按住 ctrl + m 打开菜单,选择 change bundle location 设置为 localhost:8081,重新启动下就好了